Craving authentic flavors? These Vietnamese Pho Bowls combine fragrant broth, tender noodles, and fresh herbs for a comforting meal. Discover now.
Introduction: Can a Bowl of Noodles Be Both Comforting and Exotic?
Imagine sipping from a steaming bowl filled with aromatic broth, tender rice noodles, and slices of perfectly cooked beef—all infused with the delicate flavors of Vietnam. Sounds like comfort food at its finest, right? Well, it’s easier than you think! In this blog post, we’ll show you how to make the best Vietnamese pho bowls using three key ingredients that guarantee success every time. Let’s dive in!
For more ideas on incorporating global flavors into your meals, check out our international cuisine guide .
Overview: Why This Recipe Is Special
The Vietnamese pho bowls combine the comforting warmth of a hearty soup with the vibrant, aromatic spices of Vietnamese cuisine. Whether served as a light lunch or a soul-warming dinner, these bowls are packed with flavor and tradition.
Key Features:
- Time Requirement: Prep time is about 20 minutes, and cook time takes another 45–60 minutes (or longer for deeper flavor).
- Difficulty Level: Beginner-friendly—no fancy techniques required!
- Health Benefits: Rice noodles provide carbohydrates, while herbs and spices deliver antioxidants. For more information on nutrient-dense meals, explore this resource by Healthline .
These Vietnamese pho bowls are not only delicious but also versatile enough to fit any lifestyle.
Essential Ingredients: The Building Blocks of Success
Here’s what you’ll need to create the ultimate Vietnamese pho bowls :

Main Ingredients:
- Beef Bones (or Vegetable Stock) : Provides the base for a rich, flavorful broth.
- Star Anise and Cinnamon : Adds depth and aroma to the broth.
- Rice Noodles : Offers texture and absorbs the flavors of the dish.
Optional Add-ins:
- Fresh herbs (like cilantro, Thai basil, or mint) for freshness
- Sliced onions or scallions for added crunch
- Lime wedges or sriracha for extra tang and heat
Substitutions and Variations:
- Use chicken bones instead of beef for a lighter broth.
- Swap rice noodles for zucchini noodles for a low-carb option.
- Experiment with different proteins like tofu or shrimp for variety.
Step-by-Step Instructions: Your Roadmap to Success
Follow these simple steps to whip up the best Vietnamese pho bowls . We’ve included helpful tips along the way!
| Step | Instructions | Tips & Techniques |
|---|---|---|
| Prepare the Broth Base | 1. Roast beef bones (or use vegetable stock) in the oven at 400°F (200°C) for 30 minutes until golden. 2. In a large pot, combine roasted bones, star anise, cinnamon, ginger, garlic, and water. 3. Simmer for 1–2 hours, skimming any impurities that rise to the surface. | – Roasting the bones enhances their natural sweetness and depth. – Skimming the broth keeps it clear and clean. |
| Strain and Season the Broth | 1. Strain the broth through a fine-mesh sieve to remove solids. 2. Return the broth to the pot and season with fish sauce, soy sauce, and sugar to balance flavors. | – Adjust seasoning gradually to achieve the desired taste. – Fish sauce adds umami; substitute tamari for gluten-free options. |
| Cook the Rice Noodles | 1. Follow package instructions to cook rice noodles until al dente. 2. Drain and rinse under cold water to stop the cooking process. | – Cooking noodles separately ensures they don’t become mushy in the broth. – Rinsing prevents sticking. |
| Assemble the Bowls | 1. Divide cooked rice noodles among bowls. 2. Top with thinly sliced rare beef (or cooked protein of choice). 3. Ladle hot broth over the noodles and protein, ensuring everything is submerged. | – Use high-quality beef for maximum tenderness. – Layer ingredients evenly for balance. |
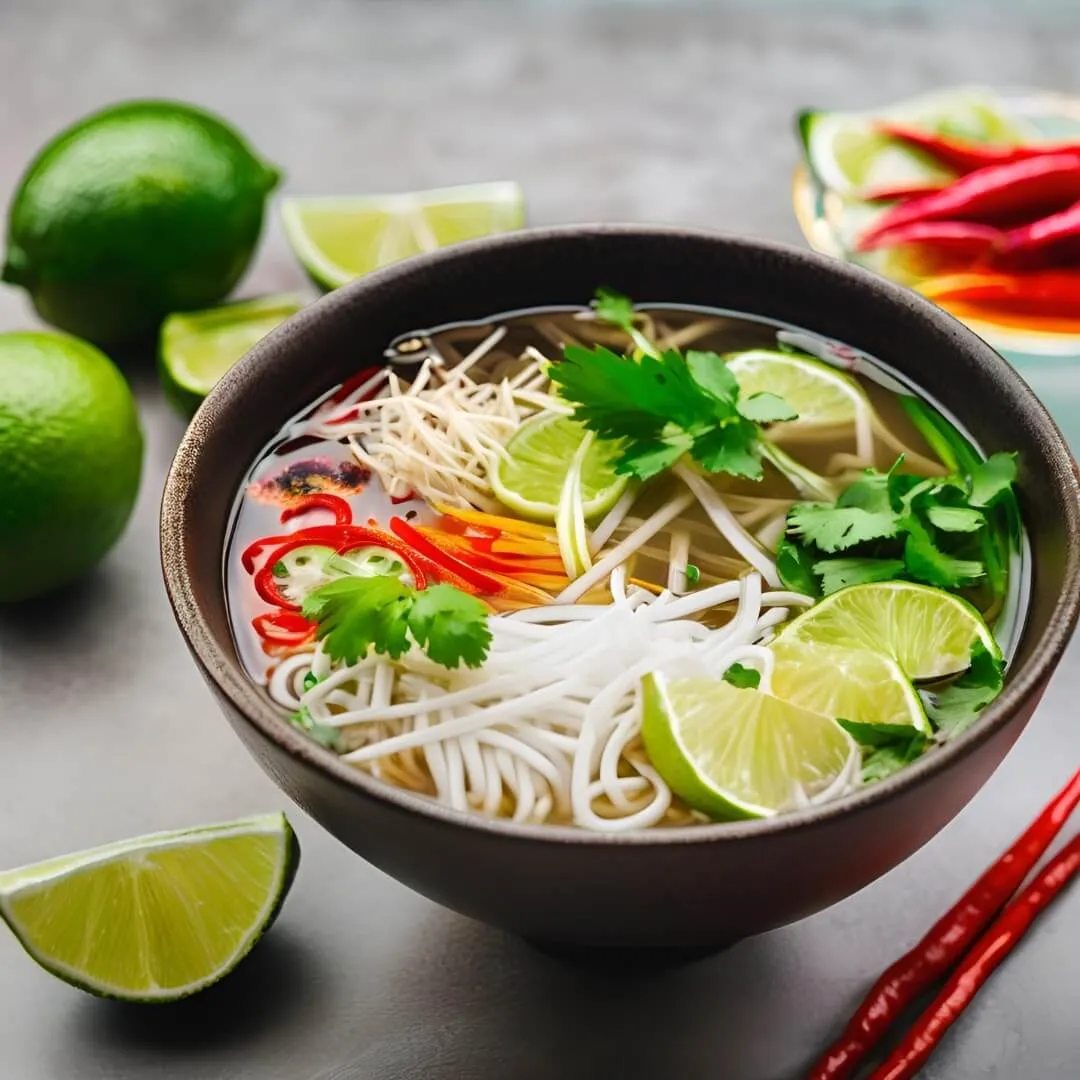
| Add Fresh Toppings | 1. Garnish each bowl with fresh herbs, bean sprouts, lime wedges, and chili slices. 2. Serve immediately with optional hoisin or sriracha on the side. | – Presentation matters—add colorful toppings for visual appeal. – Customize toppings to suit your taste. |
Assembly: Putting It All Together
Now that you’ve prepared all the elements, let’s talk about assembly and presentation.
- Start by simmering the broth with star anise and cinnamon for a fragrant foundation.
- Cook the rice noodles separately and set them aside.
- Assemble the bowls by layering noodles, protein, and hot broth, then garnish generously with fresh herbs and toppings.
- Serve with additional sauces like hoisin or sriracha for extra flavor.
Pro tip: For an authentic touch, add a pinch of black pepper to the broth for subtle warmth.
For even more variation ideas, see our other Asian-inspired recipes here .
Storage and Make-Ahead Tips: Keep It Fresh
If you’re planning ahead or want leftovers, here’s how to store and reheat your Vietnamese pho bowls :
- Storage: Store components separately in airtight containers. Broth can last up to 3 days in the fridge, while noodles should be used within 2 days.
- Reheating: Reheat the broth gently on the stove, adding cooked noodles just before serving to maintain texture.
- Freezing: Freeze individual portions of the broth for up to 2 months. Reheat and assemble when ready to serve.
Recipe Variations: Spice Things Up!
Once you’ve mastered the classic version, try these creative twists to keep things exciting:
Variation 1: Spicy Kick
Add sliced bird’s eye chilies or red pepper flakes to the broth for extra heat.
Variation 2: Vegetarian Option
Use vegetable stock and tofu or seitan for a plant-based twist.
Variation 3: Protein-Packed Bowls
Incorporate shrimp, chicken, or pork for added satisfaction.
Conclusion: Time to Get Simmering!
There you have it—the ultimate guide to making the best Vietnamese pho bowls . With their rich flavors, ease of preparation, and endless customization options, these bowls are sure to become a staple in your kitchen. So grab your pot and start simmering today! Remember, cooking should be fun, so feel free to experiment and make the recipe your own. Happy simmering!
FAQs: Answers to Common Questions
Q: Can I make this dish gluten-free?
A: Yes! Use gluten-free fish sauce and verify that all other ingredients are safe for a tasty alternative.
Q: Are there any health benefits to this recipe?
A: Absolutely! Beef provides protein, while herbs and spices deliver antioxidants—all contributing to a balanced meal.
Q: How long does it take to prepare?
A: From prep to cook, this recipe typically takes around 1–2 hours, depending on batch sizes.
Q: Can I freeze the broth?
A: Yes! Freeze the broth in portions for easy reheating whenever you’re craving a warm bowl of comfort.