Searching for global inspiration? This guide highlights three essential elements for creating authentic Japanese tamagoyaki. Discover here.
Introduction: What Makes Tamagoyaki So Special?
Have you ever wondered why Japanese Tamagoyaki is such a staple in Japanese cuisine? Could it be the soft, velvety texture that melts in your mouth? Or perhaps it’s the delicate balance of sweetness and savory flavors that make it so comforting? If you’ve tasted this rolled omelet, you know it’s more than just eggs—it’s an art form. But here’s the real question—what makes tamagoyaki so special? Is it the technique? The ingredients? Or the love that goes into making it? Let’s uncover the secrets behind this beloved dish and learn how to master it at home.
For more insights into Japanese cooking, check out our post on Japanese Breakfast Ideas .
Overview: Why This Japanese Tamagoyaki Recipe Stands Out
Our Japanese Tamagoyaki recipe captures the essence of traditional Japanese cooking while being approachable for beginners. It’s a dish that’s both simple and sophisticated, perfect for breakfast, bento boxes, or even as a snack.
What Makes This Recipe Special?
- Quick Prep Time : In under 20 minutes, you can enjoy homemade tamagoyaki.
- Easy Difficulty Level : With a few key techniques, anyone can create restaurant-quality results.
- Nutrient-Packed : Eggs provide protein, while soy sauce and mirin add umami-rich flavor.
For more information on the health benefits of eggs and other Japanese ingredients, explore this resource by Healthline .
Essential Ingredients: Your Secret Weapons for Success
Every great recipe starts with quality ingredients. Here are the three key components that make this Japanese Tamagoyaki recipe shine:
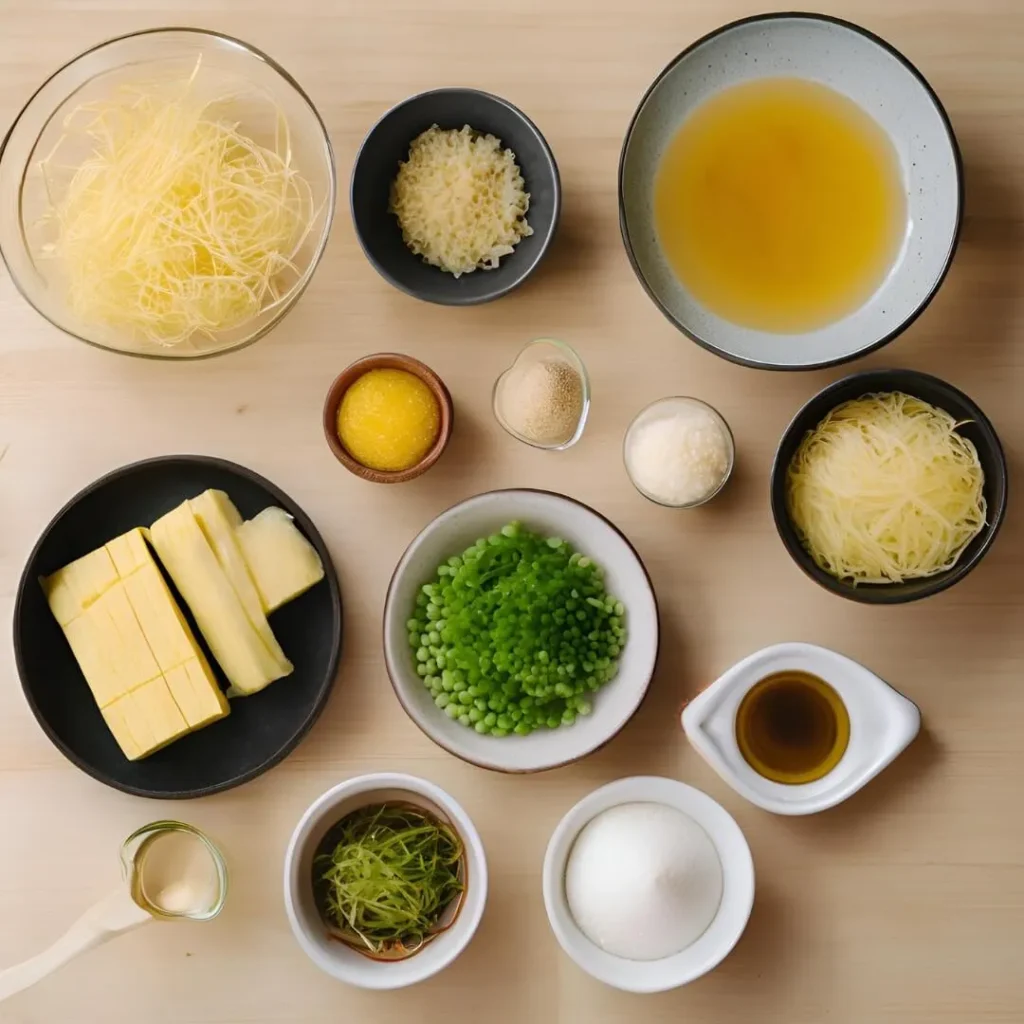
1. Eggs
- Why They’re Important : Eggs are the foundation of tamagoyaki, providing its creamy texture and golden color.
- Substitutions : For a vegan version, try using silken tofu or chickpea flour mixed with water.
2. Soy Sauce
- Why It’s Important : Soy sauce adds depth and a savory umami flavor that balances the sweetness of the dish.
- Variations : Use low-sodium soy sauce if you’re watching your salt intake.
3. Mirin (Sweet Rice Wine)
- Why It’s Important : Mirin brings a subtle sweetness and enhances the overall flavor profile.
- Substitutions : Dry sherry with a pinch of sugar can work as a substitute if mirin isn’t available.
Other essential ingredients include:
- Sugar
- Salt
- Vegetable oil for frying
Step-by-Step Instructions: Cooking Made Simple
Follow these easy steps to create your own delicious Japanese Tamagoyaki :
| Step | Instructions | Tips & Techniques |
|---|---|---|
| Prepare the Egg Mixture | 1. In a mixing bowl, whisk together eggs, soy sauce, mirin, sugar, and a pinch of salt until smooth. 2. Strain the mixture through a fine-mesh sieve for extra silkiness. | – Whisking thoroughly ensures no lumps and a uniform texture. – Straining removes any bits of egg white for a professional finish. |
| Heat the Pan | Heat a small amount of vegetable oil in a rectangular tamagoyaki pan or non-stick skillet over medium-low heat. | – Use only a light coating of oil to prevent sticking. – Medium-low heat is crucial for achieving a tender interior. |
| Cook the First Layer | 1. Pour about 1/4 of the egg mixture into the pan, tilting it to spread evenly. 2. Let it cook until mostly set but still slightly runny on top. | – Don’t rush this step; patience ensures a soft texture. – Gently lift the edges with a spatula to let uncooked egg flow underneath. |
| Roll the Pancake | 1. Use a spatula to carefully roll the cooked layer toward one end of the pan. 2. Push the roll to the far side of the pan. | – Roll tightly but gently to maintain shape. – Keep the roll near the edge to make space for the next layer. |
| Repeat the Layers | Continue adding 1/4 of the egg mixture at a time, spreading it evenly and rolling it around the existing roll until all the mixture is used. | – Each new layer should be slightly smaller than the previous one. – Allow each layer to set before rolling to avoid breaking. |
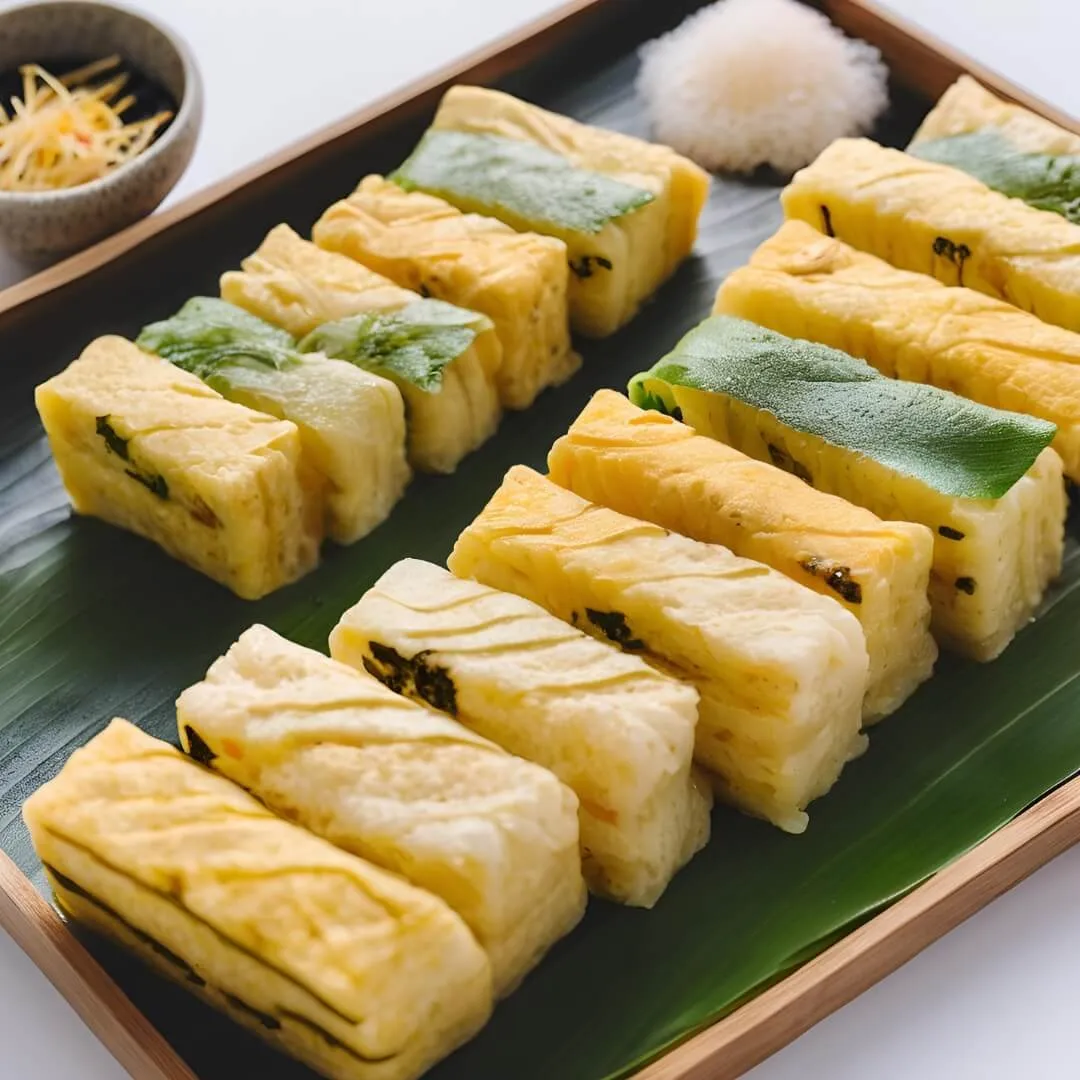
| Shape and Serve | Once complete, remove the tamagoyaki from the pan and let it cool slightly. Slice into bite-sized pieces and serve warm. | – Press the roll lightly with the back of a spatula to shape it while cooling. – Garnish with sesame seeds or nori strips for added flair. |
Assembly: Building Your Perfect Tamagoyaki Base
Once your tamagoyaki is cooked and shaped, assembling the dish is simple:
- Place the tamagoyaki on a cutting board and allow it to cool slightly.
- Slice it into neat, even pieces using a sharp knife.
- Arrange the slices on a plate and garnish with toasted sesame seeds or shredded nori.
Presentation Tip : Stack the slices slightly or fan them out for a visually appealing presentation. Pair with soy sauce or wasabi for dipping.
For even more variation ideas, see our other Asian-inspired recipes here .
Storage and Make-Ahead Tips: Keep It Fresh
Leftovers happen, and that’s okay! Here’s how to store and reheat your Japanese Tamagoyaki :
- Storage : Allow the tamagoyaki to cool completely before wrapping it in plastic wrap. Store in the refrigerator for up to 3 days.
- Reheating : Gently reheat in a microwave for 15–20 seconds or slice and toast lightly in a skillet for a crisp exterior.
Pro Tip : Prepare the egg mixture ahead of time and refrigerate it for up to 24 hours. Simply cook when ready.
Recipe Variations: Get Creative!
Here are some ideas to switch things up:
- Add Fillings : Incorporate ingredients like cooked shrimp, spinach, or cheese for added flavor and texture.
- Spicy Twist : Mix in a dash of chili flakes or sriracha for a kick of heat.
- Savory Option : Omit sugar and use only soy sauce for a more savory tamagoyaki.
Feel free to experiment with different fillings or seasonings to give your tamagoyaki a unique twist.
Conclusion: Enjoy the Art of Tamagoyaki
Our Japanese Tamagoyaki recipe proves that sometimes the best dishes come from mastering just a few key techniques. With eggs, soy sauce, and mirin, you can create a dish that’s both comforting and impressive. So gather your ingredients, practice your rolling skills, and enjoy making memories around this timeless Japanese classic. Remember, cooking should always be fun, so don’t hesitate to personalize it to suit your taste!
FAQs: All Your Burning Questions Answered
Q: Is tamagoyaki healthy?
A: Yes! Eggs are packed with protein, while soy sauce and mirin add minimal calories. Opt for whole eggs or reduce oil for a healthier version.
Q: Can I prepare the egg mixture in advance?
A: Absolutely! The egg mixture can be made up to 24 hours ahead of time and stored in the fridge. Just stir well before cooking.
Q: What are the benefits of using mirin?
A: Mirin enhances the flavor of tamagoyaki with its natural sweetness and helps balance the saltiness of soy sauce.
Q: How long does tamagoyaki last in the fridge?
A: Up to 3 days. Always reheat gently to restore its texture.