Love Korean flavors? This Kimchi Fried Rice recipe delivers bold, spicy goodness with every bite. Discover the secret now.
Introduction: Can a Bowl of Rice Be Both Spicy and Soul-Satisfying?
Imagine digging into a steaming bowl of rice that’s packed with the bold, tangy flavors of fermented kimchi, the richness of soy sauce, and the satisfying crunch of fresh vegetables. Sounds like comfort food at its finest, right? Well, it’s easier than you think! In this blog post, we’ll show you how to make the best kimchi fried rice using three key ingredients that guarantee an authentic taste every time. Let’s dive in!
For more ideas on incorporating global flavors into your meals, check out our international cuisine guide .
Overview: Why This Recipe Is Special
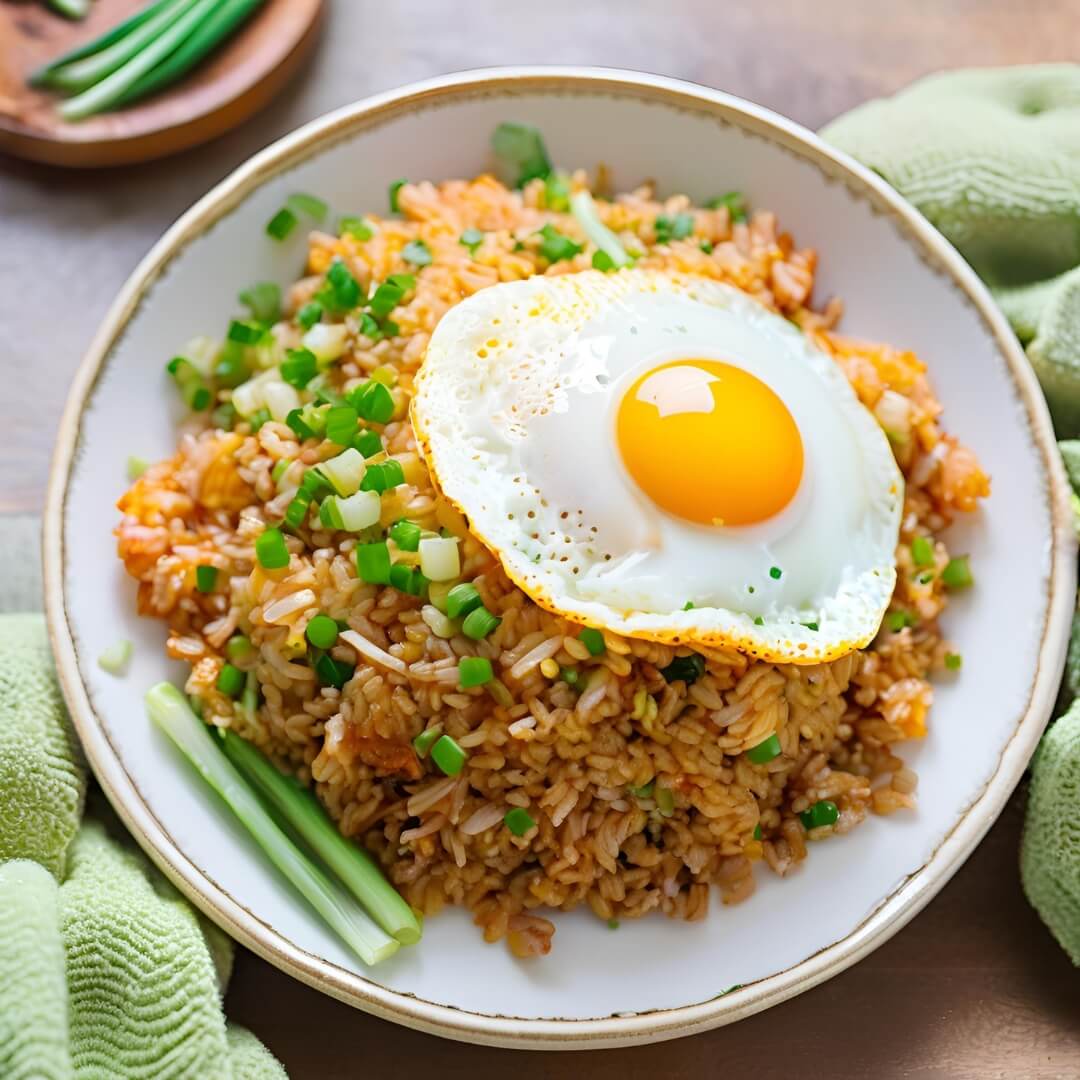
The kimchi fried rice is a beloved Korean dish that combines the umami-rich kick of kimchi with tender grains of rice, creating a harmonious blend of flavors and textures. Whether served as a quick weeknight dinner or a weekend feast, this recipe is both satisfying and versatile.
Key Features:
- Time Requirement: Prep time is about 15 minutes, and cook time takes another 15–20 minutes.
- Difficulty Level: Beginner-friendly—no fancy techniques required!
- Health Benefits: Kimchi provides probiotics, rice offers carbohydrates, and vegetables deliver vitamins. For more information on nutrient-dense meals, explore this resource by Healthline .
This kimchi fried rice is not only delicious but also packed with cultural significance and nutrition.
Essential Ingredients: The Building Blocks of Success
Here’s what you’ll need to create the ultimate kimchi fried rice :

Main Ingredients:
- Kimchi : Fermented cabbage that brings heat, tanginess, and depth of flavor.
- Rice : Day-old cooked rice works best for texture.
- Soy Sauce : Adds saltiness and umami to balance the dish.
Optional Add-ins:
- Vegetables (like carrots, onions, or bell peppers) for added color and crunch
- Eggs (fried or scrambled) for protein
- Sesame seeds or green onions for garnish
Substitutions and Variations:
- Use short-grain or sushi rice for stickier results.
- Swap soy sauce for tamari or coconut aminos for gluten-free options.
- Experiment with different types of kimchi (radish or cucumber) for unique twists.
Step-by-Step Instructions: Your Roadmap to Success
Follow these simple steps to whip up the best kimchi fried rice . We’ve included helpful tips along the way!
| Step | Instructions | Tips & Techniques |
|---|---|---|
| Prepare the Kimchi | 1. Finely chop kimchi into bite-sized pieces. 2. Squeeze out excess liquid to prevent sogginess. | – Removing moisture ensures crispier rice. – Adjust the amount of kimchi based on spice preference. |
| Cook the Aromatics | 1. Heat oil in a large skillet or wok over medium heat. 2. Add minced garlic and chopped onion, sautéing until fragrant and translucent. | – Don’t burn the garlic—it can become bitter. – Onions add sweetness to balance the spiciness. |
| Add the Kimchi | 1. Stir in chopped kimchi and cook for 2–3 minutes, allowing the flavors to intensify. 2. Add diced vegetables if using and stir-fry briefly. | – Cooking kimchi releases its oils and enhances flavor. – Use firm vegetables that hold their shape during cooking. |
| Incorporate the Rice | 1. Pour in day-old rice and break apart any clumps with a spatula. 2. Mix well with the kimchi mixture, ensuring even distribution. | – Day-old rice prevents mushiness. – Keep stirring to avoid sticking. |
| Season with Soy Sauce | 1. Drizzle soy sauce over the rice and toss everything together. 2. Taste and adjust seasoning as needed. | – Soy sauce balances the acidity of kimchi. – Start with less and add gradually for desired saltiness. |
| Finish with Protein (Optional) | 1. Push the rice to one side of the pan and crack an egg into the empty space. 2. Scramble or fry the egg and mix it into the rice for extra richness. | – Adding an egg elevates the dish with creamy texture. – Customize protein options (e.g., tofu, beef, or shrimp). |
| Garnish and Serve | 1. Sprinkle sesame seeds or green onions on top for garnish. 2. Serve hot and enjoy immediately. | – Presentation matters—add colorful toppings for visual appeal. – Serve with kimchi on the side for extra zing. |
Assembly: Putting It All Together
Now that you’ve prepared all the elements, let’s talk about assembly and presentation.
- Start by chopping the kimchi finely and squeezing out excess liquid for optimal texture.
- Sauté aromatics like garlic and onion to build a flavorful base.
- Add the kimchi and vegetables, then incorporate the rice and soy sauce for a cohesive dish.
- Finish with an optional protein like eggs or meat for added satisfaction.
- Garnish with sesame seeds or green onions before serving.
Pro tip: For an authentic touch, use a cast-iron skillet or wok for better heat distribution and smoky flavor.
For inspiration on creative presentations, explore these ideas .
Storage and Make-Ahead Tips: Keep It Fresh
If you’re planning ahead or want leftovers, here’s how to store and reheat your kimchi fried rice :
- Storage: Allow the rice to cool completely, then transfer it to an airtight container. Store in the refrigerator for up to 3 days.
- Freezing: While freezing isn’t ideal due to texture changes, you can freeze individual portions for up to 2 months.
- Reheating: Reheat in the microwave for 1–2 minutes, stirring halfway through, or warm in a skillet with a splash of water or oil for freshness.
Recipe Variations: Spice Things Up!
Once you’ve mastered the classic version, try these creative twists to keep things exciting:
Variation 1: Tofu Kimchi Fried Rice
Add cubed tofu for a plant-based protein boost.
Variation 2: Beef Kimchi Fried Rice
Stir in thinly sliced beef for a hearty, savory twist.
Variation 3: Spicy Kick
Incorporate gochujang (Korean chili paste) for extra heat and depth.
Conclusion: Time to Get Stirring!
There you have it—the ultimate guide to making the best kimchi fried rice . With its bold flavors, ease of preparation, and endless customization options, this dish is sure to become a staple in your kitchen. So grab your spatula and start cooking today! Remember, cooking should be fun, so feel free to experiment and make the recipe your own. Happy stirring!
FAQs: Answers to Common Questions
Q: Can I make this dish gluten-free?
A: Yes! Use gluten-free soy sauce or tamari for a safe option.
Q: Are there any health benefits to this recipe?
A: Absolutely! Kimchi provides probiotics, rice offers energy, and vegetables deliver vitamins—all contributing to a balanced meal.
Q: How long does it take to prepare?
A: From prep to cook, this recipe typically takes around 30–35 minutes, depending on batch sizes.
Q: Can I freeze this fried rice?
A: While freezing isn’t ideal due to texture changes, you can freeze individual portions for later reheating.